Winter hiking checklist for cold-weather trails
A winter hiking checklist adapts standard trail gear for freezing temperatures, snow-covered terrain, and short daylight hours. Built around a cold-weather version of the Ten Essentials, it pairs a moisture-wicking three-layer clothing system with footwear traction like microspikes or snowshoes, insulated water bottles that resist freezing, and extra lighting. Carrying redundant thermal protection and shelter helps prevent hypothermia if a storm or injury slows your pace.
On this page
Preparing for cold-weather trail conditions
Winter transforms familiar three-season footpaths into demanding backcountry routes. Snow obscures trail blazes and rock cairns, ice coats tilted bedrock, and valley mildness gives way to sub-freezing wind chills on exposed ridgelines. Our hiking and camping checklists emphasize self-reliance in every season, but winter hiking removes the margin for error that warm summer afternoons allow. When an ankle sprain or navigation delay forces an unplanned stop at twenty degrees Fahrenheit, the clothing and emergency gear inside your pack determine whether you stay warm until help arrives.
Every cold-weather outing starts with the National Park Service Ten Essentials scaled up for snow, wind, and darkness, alongside the Leave No Trace Seven Principles adapted for winter ecosystems. Because winter gear is bulkier and heavier than summer equipment, most hikers step up from a small summer daypack to a 28 to 40-liter pack capable of holding extra insulation, insulated flasks, and external traction devices.
Change Gear earns a commission when you buy through some links on this page, at no cost to you. It never decides what we recommend.
The Ten Essentials adapted for winter hiking
In freezing conditions, standard three-season emergency items often fail. Water filters crack when residual water freezes inside hollow fibers, butane lighters lose vapor pressure, and thin emergency blankets tear in high winds. Use this winter-adapted checklist to winterize all ten systems:
- Navigation (topographic map, baseplate compass, and GPS) (2 to 8 oz / 57 to 227 g): Carry a waterproof paper topographic map and liquid-filled magnetic compass in a jacket pocket. Snow covers footpaths and trail junctions, making compass bearings and offline GPS tracks essential even on trails you hike often in summer. Because cold temperatures drain smartphone batteries rapidly, carrying a standalone unit like the one covered in our Garmin inReach Mini 2 review ensures two-way SOS and compass redundancy down to -4°F.
- Headlamp plus backup light and lithium batteries (3 to 6 oz / 85 to 170 g total): Pack two LED headlamps or a primary headlamp and a backup flashlight loaded with lithium batteries, which resist cold-weather voltage drain far better than alkaline cells.
- Sun and wind-glare protection (glacier sunglasses, goggles, and SPF 30+ sunscreen) (4 to 8 oz / 113 to 227 g): Fresh snow reflects intense ultraviolet radiation upward toward your face, nostrils, and chin. Pack wrap-around sunglasses for clear skies, tinted snow goggles for blowing ice crystals above treeline, and broad-spectrum sunscreen with SPF lip balm.
- Winterized first aid kit and chemical heat packs (6 to 12 oz / 170 to 340 g): Include standard wound dressings, blister care, and medications stored in an interior pack pocket so liquid gels do not freeze, plus air-activated hand and toe warmers. See our hiking first aid kit checklist for complete medical supply breakdowns.
- Knife, multi-tool, and winter repair kit (3 to 7 oz / 85 to 198 g): A folding knife or multi-tool that can be opened while wearing liner gloves, plus heavy-duty nylon cable ties, ski straps, and fabric repair tape for fixing broken snowshoe bindings or torn shell fabric.
- Stormproof fire starter and tinder (1.5 to 3 oz / 43 to 85 g): Butane lighters struggle in freezing air. Pack windproof, waterproof storm matches, a ferrocerium spark rod, and waterproof wax-infused tinder cubes in a sealed case.
- Emergency winter shelter (bivy sack and closed-cell foam sit pad) (4 to 14 oz / 113 to 397 g): Replace fragile mylar sheets with a tear-resistant heat-reflective emergency bivy sack or a two-person storm shelter. Carry a folding closed-cell foam pad to insulate your body from conductive heat loss when sitting or kneeling on snow.
- Extra high-calorie winter food (10 to 16 oz / 283 to 454 g): Cold weather increases caloric burn as your body works to maintain core heat. Pack an extra day of high-fat, high-carbohydrate snacks that do not freeze solid, such as roasted nuts, chocolate squares, cheese, and soft energy bars kept in a warm pocket.
- Insulated water bottles and chemical treatment (10 to 24 oz empty / 283 to 680 g): Carry two wide-mouth plastic bottles inside insulated foam sleeves or a vacuum-insulated stainless steel bottle (11 to 14 oz / 312 to 397 g empty for a 24-ounce flask). Skip hollow-fiber squeeze filters in sub-freezing weather and pack chlorine dioxide tablets as backup treatment.
- Extra cold-weather insulation (14 to 28 oz / 397 to 794 g): Even if the forecast calls for calm skies, pack a high-loft hooded down or synthetic belay jacket, spare waterproof mittens, spare wool socks, and an extra fleece hat inside a waterproof dry bag.
Footwear, traction devices, and gaiters
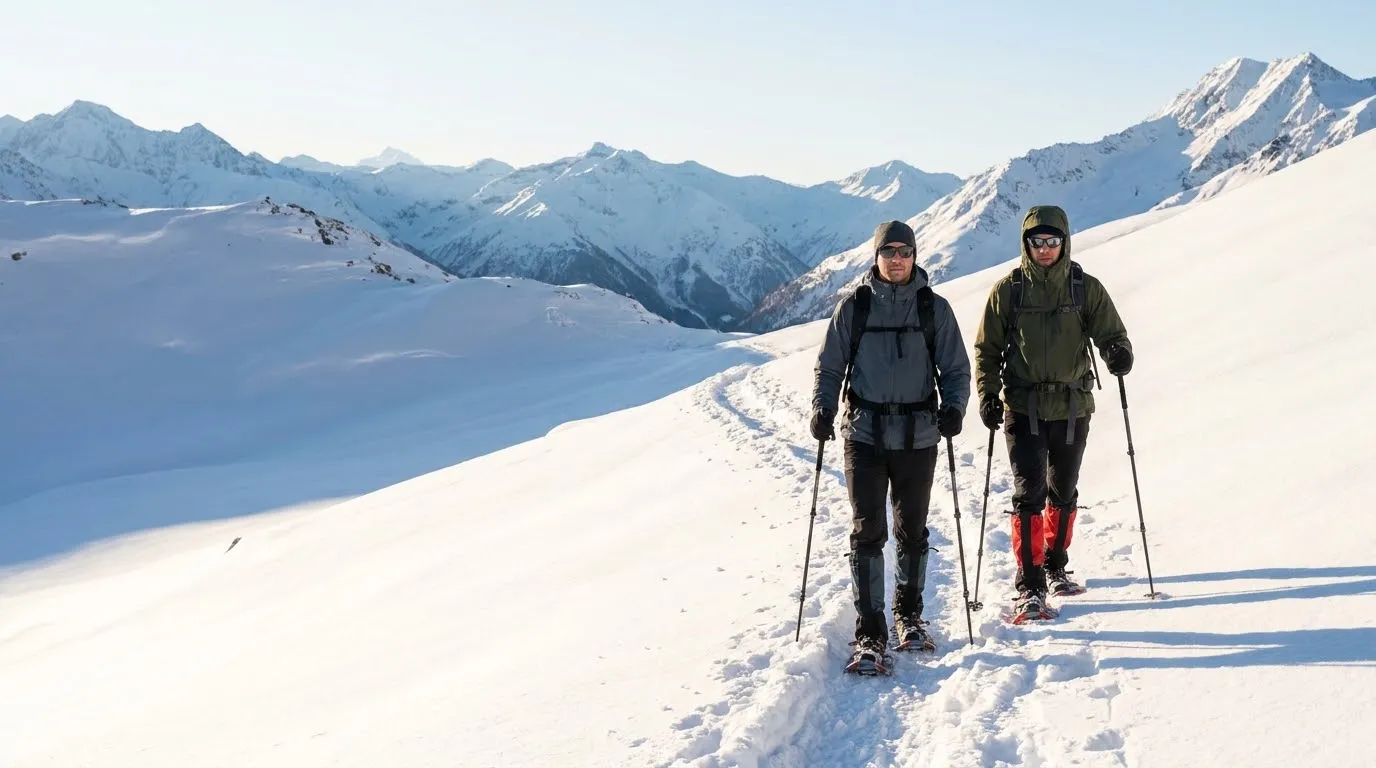
Slippery ice and deep snow drifts require specialized footwear and modular traction. The Rocky Mountain National Park winter gear checklist highlights waterproof boots, gaiters, and flotation or traction systems as mandatory equipment for snow-covered trails.
- Insulated waterproof winter hiking boots (2.2 to 3.5 lbs per pair / 1.0 to 1.6 kg): Mid-cut or high-cut boots with a waterproof membrane, lugged rubber outsoles that stay pliable in cold temperatures, and 200 to 400 grams of synthetic insulation for sub-freezing trails.
- Midweight or heavyweight merino wool hiking socks (2.5 to 4.5 oz per pair / 71 to 128 g): High-loft wool blend socks that trap warm air around the toes without constricting blood circulation inside your boots. Pack a dry spare pair in your pack, and compare wool weights in our guide to the best hiking socks.
- Waterproof knee-high gaiters (7.5 to 11.5 oz per pair / 213 to 326 g): Abrasion-resistant nylon gaiters that seal the gap between your pants and boot tops, keeping deep powder, slush, and ice crystals from entering your footwear and soaking your socks.
- Microspikes or elastomer chain traction (10 to 15 oz per pair / 283 to 425 g): Stainless steel spikes linked by welded chains and a stretchy elastomer harness that slips over hiking boots for secure grip on packed snow and trail ice.
- Trail and backcountry snowshoes (3.2 to 4.2 lbs per pair / 1.45 to 1.9 kg): Aluminum or composite decks with integrated crampon teeth and heel lifts that distribute your weight over deep powder to prevent exhausting postholing.
- Trekking poles with winter snow baskets (10 to 20 oz per pair / 283 to 567 g): Flick-lock aluminum poles fitted with wide, notched snow baskets that keep pole tips from plunging deep into soft snowdrifts when balancing on uneven slopes.
Cold-weather clothing layering system
Managing perspiration is just as important as blocking wind. The National Weather Service cold safety guidance recommends dressing in loose-fitting, lightweight layers that trap insulating air while avoiding cotton entirely. Adjust your layers proactively throughout the day: start hiking slightly cool so you do not drench your base layer on the first climb, and pull on your insulated parka immediately when stopping for rest breaks.
- Synthetic or merino wool base layer top and bottoms (5 to 9 oz each / 142 to 255 g): Next-to-skin crew neck or zip-neck shirt and full-length leggings in 150 to 250 g/m2 merino wool or polyester grid fabric to move sweat off your skin.
- Breathable fleece or active-insulation mid-layer (9 to 16 oz / 255 to 454 g): Fleece pullover or breathable synthetic jacket that insulates while allowing water vapor to escape during uphill exertion.
- Softshell winter hiking pants (12 to 20 oz / 340 to 567 g): Wind-resistant, water-repellent stretch woven pants that shed light snow and breathe better than full rain pants during steady movement.
- Waterproof and windproof hardshell jacket and pants (10 to 18 oz each / 283 to 510 g): Seam-sealed outer shell layers that block freezing rain, wet snow, and ridgeline gusts. Look for side ventilation zippers on both the jacket and pants to dump heat on climbs and allow easy layering over boots.
- Packable down or synthetic puffy jacket (12 to 24 oz / 340 to 680 g): High-loft insulated jacket with an adjustable hood, kept dry inside your pack and worn during summit stops, lunch breaks, or trail emergencies.
- Modular glove and mitten system (4 to 10 oz total / 113 to 283 g): Thin touch-screen liner gloves for dexterity when adjusting gear, paired with windproof fleece gloves and waterproof insulated outer mittens. As the National Weather Service notes, mittens snug at the wrist keep fingers warmer than five-finger gloves by clustering digits together.
- Fleece or wool beanie and neck gaiter or balaclava (3 to 6 oz total / 85 to 170 g): Covers the head, ears, neck, and lower face to reduce heat loss and warm frigid air before you inhale it.
Pack and winter trail accessories
Organizing your winter pack so critical items are reachable without taking off your gloves saves time and preserves hand warmth in windy conditions.
- Winter daypack (28 to 40 liters) (2.0 to 3.5 lbs / 0.9 to 1.6 kg): A supportive internal-frame pack with external lash straps or webbing loops for securing snowshoes and trekking poles, plus glove-friendly zipper pulls.
- Waterproof dry bags or pack liner (2 to 5 oz / 57 to 142 g): Color-coded silnylon or TPU dry sacks that keep your spare base layer, socks, and down parka dry if wet gear goes inside the main compartment.
- Collapsible aluminum snow shovel and avalanche probe (if traveling in avalanche terrain) (1.8 to 2.5 lbs combined / 0.8 to 1.1 kg): Required alongside an avalanche transceiver and formal training whenever your route crosses or travels beneath snow-loaded slopes steeper than 30 degrees.
- Human waste disposal bags (WAG bags) and trowel (2 to 4 oz / 57 to 113 g): Because frozen soil prevents digging a six-inch cathole and snowmelt carries waste into watersheds, many winter trails require packing out solid human waste in approved double-sealed gel disposal bags.
Recognizing and responding to hypothermia and frostbite
Cold-weather hikers must monitor themselves and their partners continuously for cold injuries. According to the CDC winter weather prevention guide and the National Weather Service, hypothermia occurs when the body loses heat faster than it can produce it, causing core body temperature to fall below 95 degrees Fahrenheit. Because cooling blood affects brain function early, a hiker developing hypothermia often does not notice their own impairment.
Watch for these warning signs identified by the CDC and NWS:
- Early hypothermia signs in adults: Uncontrollable shivering, fatigue or apparent exhaustion, fumbling hands and loss of fine motor coordination (struggling with pack buckles or zippers), confusion, and memory loss.
- Severe hypothermia signs: Shivering stops, speech becomes slurred or incoherent, drowsiness progresses toward unconsciousness, breathing slows, and the pulse weakens.
- Frostbite warning signs: Loss of feeling, numbness, tingling, and a white, waxy, or grayish-yellow appearance on extremities and exposed skin such as fingers, toes, earlobes, cheeks, and the tip of the nose. At a wind chill of minus 20 degrees Fahrenheit, frostbite can develop on bare skin in 30 minutes.
If anyone in your group shows signs of hypothermia or frostbite, stop and act immediately:
- Move out of the wind and onto insulation: Pitch an emergency shelter or move into dense trees, and sit or lay the person on a closed-cell foam pad so snow does not draw heat from their body.
- Replace wet layers with dry clothing: Remove damp base layers and put on dry thermal tops, a down parka, a warm hat covering the head and neck, and dry mittens.
- Warm the core first: Place extra insulation or chemical heat packs (wrapped in cloth so they do not burn skin) at the chest, neck, and groin. Never warm arms and legs first, as the National Weather Service warns that rewarming extremities first drives cold blood back toward the heart and can trigger heart failure.
- Provide warm, non-alcoholic fluids and calories: If the hiker is fully alert and able to swallow, offer warm broth first, as the National Weather Service advises, followed by easy-to-digest food. Never give alcohol, drugs, coffee, or any hot beverage, and never give anything by mouth to someone who is drowsy or confused.
- Call for emergency rescue: Use your phone or satellite communicator to contact search and rescue if symptoms do not rapidly resolve or if core temperature is below 95 degrees Fahrenheit.
Managing short winter daylight and trail etiquette
In December and January, daylight across much of the northern United States lasts only nine to ten hours, and canyon walls or dense conifers bring twilight well before official sunset. Check the local sunset time before leaving home, set a strict turnaround time no later than early afternoon, and begin your hike at first light. Keep in mind that walking in snowshoes or breaking trail through fresh powder often cuts your normal hiking speed in half.
Practice winter Leave No Trace principles on shared trails:
- Respect groomed tracks: If a trail is groomed for cross-country skiing, walk on the designated snowshoe or boot side of the corridor rather than stepping into parallel ski tracks.
- Pack out all organic waste: Orange peels, nut shells, and food scraps freeze solid in snowbanks and remain visible when spring thaw arrives.
- Check road and trailhead closures: Many mountain park roads close seasonally to vehicles, adding extra mileage to summer trailhead approaches.
Compare fair-weather packing needs in our day hike checklist, or build a custom cold-weather gear list for your next route using our packing list tool.
Frequently asked questions
How do the Ten Essentials change for a winter hike?
Every system in the Ten Essentials requires cold-weather upgrades during winter. Standard trail water bladders are replaced with wide-mouth bottles stored inside insulated sleeves so valves do not freeze. Extra clothing expands to include a high-loft down or synthetic parka, spare mittens, and a balaclava. Hikers also carry two headlamps with lithium batteries, high-fat snacks that stay chewable in sub-freezing air, and an emergency bivy sack.
When should you wear microspikes instead of snowshoes?
Use flexible elastomer chain traction devices like microspikes on packed snow, icy boot tracks, and frozen rock slabs where your boots do not sink deeply. Switch to snowshoes when fresh or drifted snow exceeds six to eight inches of depth and causes postholing, which happens when your foot plunges through the snowpack up to your calf or knee and rapidly exhausts leg muscles.
How do you keep drinking water from freezing on a winter hike?
Leave narrow-tube hydration reservoirs at home because water inside exposed plastic hoses freezes within minutes below 32 degrees Fahrenheit. Instead, carry wide-mouth plastic bottles or vacuum-insulated stainless steel flasks. Start the hike with warm or boiling water, store bottles upside down inside closed-cell foam sleeves so ice forms at the bottom rather than the cap threads, and pack them inside your backpack near your back.
Why should you avoid wearing cotton clothing in cold weather?
Cotton absorbs perspiration and melted snow like a sponge, holding moisture directly against your skin and losing its insulating value when wet. As your pace slows or wind speed increases, wet cotton accelerates conductive heat loss and raises the risk of hypothermia. Synthetic polyester, polypropylene, and merino wool base layers move sweat away from the skin and retain warmth even when damp.
What are the early warning signs of hypothermia on the trail?
According to the Centers for Disease Control and Prevention and the National Weather Service, early hypothermia symptoms in adults include uncontrollable shivering, exhaustion, fumbling hands, clumsiness, confusion, and memory loss. As core temperature drops further, shivering may stop completely while slurred speech and drowsiness set in. Treat any combination of these signs as a medical emergency by getting the hiker into dry insulation and shelter immediately.
How do you keep phone and headlamp batteries from dying in the cold?
Cold temperatures slow the electrochemical reactions inside standard alkaline and rechargeable lithium-ion batteries, causing rapid voltage drops in exterior pack pockets. Store your smartphone, portable power bank, and GPS messenger inside a zippered interior chest pocket warmed by your body heat. For headlamps and handheld navigation units, install non-rechargeable lithium cells, which maintain reliable output in sub-zero temperatures.
Sources
- National Park Service: Ten Essentials
- National Park Service: Winter Backpacking Gear Checklist (Rocky Mountain National Park)
- National Weather Service: Cold Weather Safety
- National Weather Service Duluth: Stay Safe in the Extreme Cold
- CDC: Preventing Frostbite and Hypothermia
- Leave No Trace: The Seven Principles