How to prevent blisters when hiking on trail
To prevent blisters while hiking, eliminate friction, manage foot moisture, and ensure proper boot fit. Wear fitted merino wool or synthetic socks instead of cotton, lace boots securely to stop heel slip, and stop immediately at the first sign of warmth to tape the hot spot. Keep skin dry by airing out feet during breaks, and leave any closed blisters intact as a natural sterile shield against infection.
On this page
The blister triad: friction, moisture, and fit
Blister prevention begins by understanding how foot friction develops on trail. When you invest in dependable hiking gear, your boots, socks, and skin function as an interconnected mechanical system. Friction blisters are not thermal burns; they are mechanical shear injuries. As your foot strikes the ground thousands of times per mile, your outer skin layers slide across underlying dermal tissues. This repetitive shearing separates the stratum spinosum layer from deeper tissue, allowing lymphatic fluid to seep into the void and create a painful, fluid-filled blister.
Three distinct variables control the severity of shear forces: skin friction, ambient moisture, and footwear fit. When all three factors align against you, blisters can develop in less than an hour of continuous trail walking.
Understanding mechanical shear forces
Every step on uneven terrain exerts two distinct forces on your foot: downward vertical pressure and horizontal shear stress. Downward pressure compresses the fat pads beneath your heel and metatarsal bones. Horizontal shear stress occurs when your foot moves inside the boot while the outer boot sole grips the trail. If your footwear does not hold your heel securely, your skin rubs against the interior heel pocket on every single ascent and descent. Over five miles, an average hiker takes between ten thousand and twelve thousand steps. Even a microscopic slip of one or two millimeters per stride produces massive cumulative abrasion.
Why moisture weakens skin defense
Moisture dramatically accelerates blister development by altering the mechanical properties of your skin. Under dry conditions, human skin possesses natural tensile strength and a modest coefficient of friction against smooth sock fabrics. However, prolonged sweat accumulation or stream crossings saturate the outer stratum corneum, a process known as maceration.
Macerated skin softens, loses structural resilience, and becomes far more susceptible to friction damage than dry tissue. Furthermore, damp sock fabrics lose their smoothness and cling tightly to moist skin. Instead of allowing the sock to glide harmlessly against the foot, damp fabric grips the epidermis, transferring sliding friction directly into your delicate deeper tissue layers.
How footwear volume and slippage create pressure points
Footwear that does not match your foot shape creates concentrated pressure zones. A boot that is too narrow squeezes the metatarsal heads, forcing the toes to rub tightly against one another or against the interior side walls. Conversely, footwear that is too loose allows the entire foot to slide forward on descents, jamming your toes against the front toe cap and causing both toe blisters and bruised toenails. Reviewing our hiking boot fit guide helps you evaluate heel hold, instep volume, and toe clearance before you commit to a long journey. Taking time to break in hiking boots indoors also softens stiff synthetic panels and leather cuffs so the collar flexes naturally with your ankle instead of abrading your Achilles tendon.
Change Gear earns a commission when you buy through some links on this page, at no cost to you. It never decides what we recommend.
Sock selection and layering systems
Your socks serve as the primary protective buffer between your skin and the rigid internal materials of your boots. Choosing the wrong sock material or wearing socks with coarse internal seams causes friction on long trail days.
Choosing merino wool or synthetic performance socks
The single most important rule of trail footwear is to eliminate cotton entirely. Cotton fibers are hydrophilic: they absorb water, hold it against your skin, flatten out under body weight, and turn abrasive as they dry. Dedicated trail socks rely on merino wool or performance synthetics like nylon, polyester, and elastane. You can explore proven wool and synthetic options in our guide to the best hiking socks.
Merino wool fibers are naturally hygroscopic, absorbing vapor into their core while keeping the surface dry to the touch. This property helps regulate skin temperature across changing trail conditions while retaining natural springiness even when damp. Synthetic fibers like nylon and polyester do not absorb water, allowing sweat to pass quickly through to the outer shoe lining where it can evaporate. High-density knitting across the heel pocket, Achilles cuff, and underfoot strike zones provides durable cushioning that absorbs impact and prevents fabric bunching inside your shoes.
When to consider sock liners
A two-sock layering system provides effective friction management for hikers prone to persistent heel or arch hot spots. The system pairs a thin, ultra-light liner sock made of synthetic polyester, polypropylene, or silk directly against the skin, underneath a standard midweight merino wool sock.
The mechanical benefit of this combination relies on differential friction. The slick liner sock fits snugly against the foot like a second skin. When your boot moves, the outer wool sock rubs against the slick surface of the inner liner rather than against your bare skin. Shear forces dissipate between the two layers of fabric.
However, sock liners require adequate internal boot volume. If your footwear already fits snugly across the forefoot, adding a second sock increases internal pressure, constricts blood circulation, and causes friction against the side of your toes.
Managing trail grit and sweaty socks
Fine trail dirt, sand, and decomposed granite frequently sift through mesh uppers or tumble over low-cut collars. These mineral particles act like sandpaper inside your sock, abrading the skin and causing rapid blister formation.
To manage this risk on a day hike or multi-day backpacking trip, stop mid-day to remove your footwear and socks. Shake out loose debris from inside your boots and turn your socks inside out to dislodge trapped sand. Give your bare feet ten to fifteen minutes to dry in the breeze before putting on clean, dry socks. Carrying a spare pair of hiking socks on your pack strap allows damp pairs to air-dry while you continue walking.
Pre-taping and protecting high-friction zones
Hikers who consistently develop hot spots in specific spots, such as the back of the heel, the outer edge of the big toe, or beneath the ball of the foot, benefit greatly from pre-taping before taking a single step on trail.
Best tapes for trail use
Not all medical tapes withstand trail sweat and friction. Standard paper surgical tapes and adhesive plastic bandages peel off within twenty minutes of active hiking.
- Leukotape P: A rigid, zinc-oxide adhesive strapping tape that offers exceptional adhesion. It stays bonded to sweaty skin for multiple consecutive days without sliding or bunching.
- Kinesiology Tape: Flexible, elastic cotton tape with heat-activated adhesive. It conforms easily to complex compound curves around the heel and ankle without creating restrictive folds.
- Hypafix or Cover-Roll Stretch: A wide, breathable polyester fabric tape often applied directly to the skin as an ultra-comfortable protective base layer beneath rigid Leukotape.
- Hydrocolloid Dressings: Flexible gel pads that cushion existing hot spots and provide moist healing environments for established blisters.
Mayo Clinic says athletic tape and duct tape work well for taping spots that tend to get blisters before your activity. If you use duct tape, apply it to dry skin, and remove it gently if your skin feels irritated.
Technique for taping heels and toes
Proper tape application requires clean, dry skin. Follow these steps to ensure tape stays securely anchored:
- Clean the target area thoroughly with an alcohol prep pad or clean water to remove oils, dirt, and lingering trail dust. Allow the skin to dry completely.
- Cut the tape to shape with small trauma shears, rounding all four corners with curved cuts. Square, pointed corners catch against your sock and peel loose almost immediately.
- Apply the tape smoothly across the skin without stretching it excessively, which can pinch tissue or cut off surface circulation.
- Press the tape down firmly with your warm palm for thirty seconds to activate the pressure-sensitive adhesive.
- If taping toes, wrap each toe individually without overlapping tape ends into tight constrictive bands that restrict capillary blood flow.
Lubricants and anti-chafe balms
Topical anti-friction balms and lubricants, such as specialized foot powders and anti-chafe sticks, reduce skin-on-sock friction by decreasing the surface coefficient of drag. Balms work well for short distances or between closely spaced toes where tape application is awkward. However, petroleum-based lubricants break down over extended mileage, attract fine trail grit, and can saturate sock fibers, reducing their wicking performance over long days. For serious backcountry trips, adhesive tape remains the more durable mechanical barrier.
How to identify and treat hot spots before blisters form
The most critical skill in blister prevention is listening to early sensory signals from your feet. A blister never appears without warning; it always starts as a hot spot.
Recognizing early friction sensations
A hot spot is an area of localized skin irritation where friction has generated warmth and mild inflammation, but fluid has not yet accumulated beneath the epidermis. You will feel a distinct sensation of localized heat, gentle pinching, or faint stinging against your sock. The skin will appear mildly flushed and pink when inspected, but the epidermal layer remains firmly anchored to the dermis.
According to guidance from the American Academy of Dermatology, stopping physical activity at the very first sign of pain, discomfort, or localized redness prevents the formation of deeper skin lesions. Many hikers make the mistake of waiting for a planned rest stop or meal break to address foot irritation. Waiting even ten minutes after feeling a hot spot allows repetitive shear forces to complete the mechanical separation of skin layers, turning an easily preventable warm spot into an open, painful wound.
Immediate trailside hot spot protocol
When you feel a hot spot developing, execute this immediate field protocol:
- Stop immediately: Pull over to a safe, level spot off the trail tread and unlace your boot.
- Inspect the foot: Take off your sock and locate the exact point of redness. Feel inside your boot lining for folded seams, grit, or compressed footbed edges that might have caused the issue.
- Dry the skin: Wipe away moisture and trail dust with a clean bandana or sterile alcohol pad, letting the skin air-dry for two minutes.
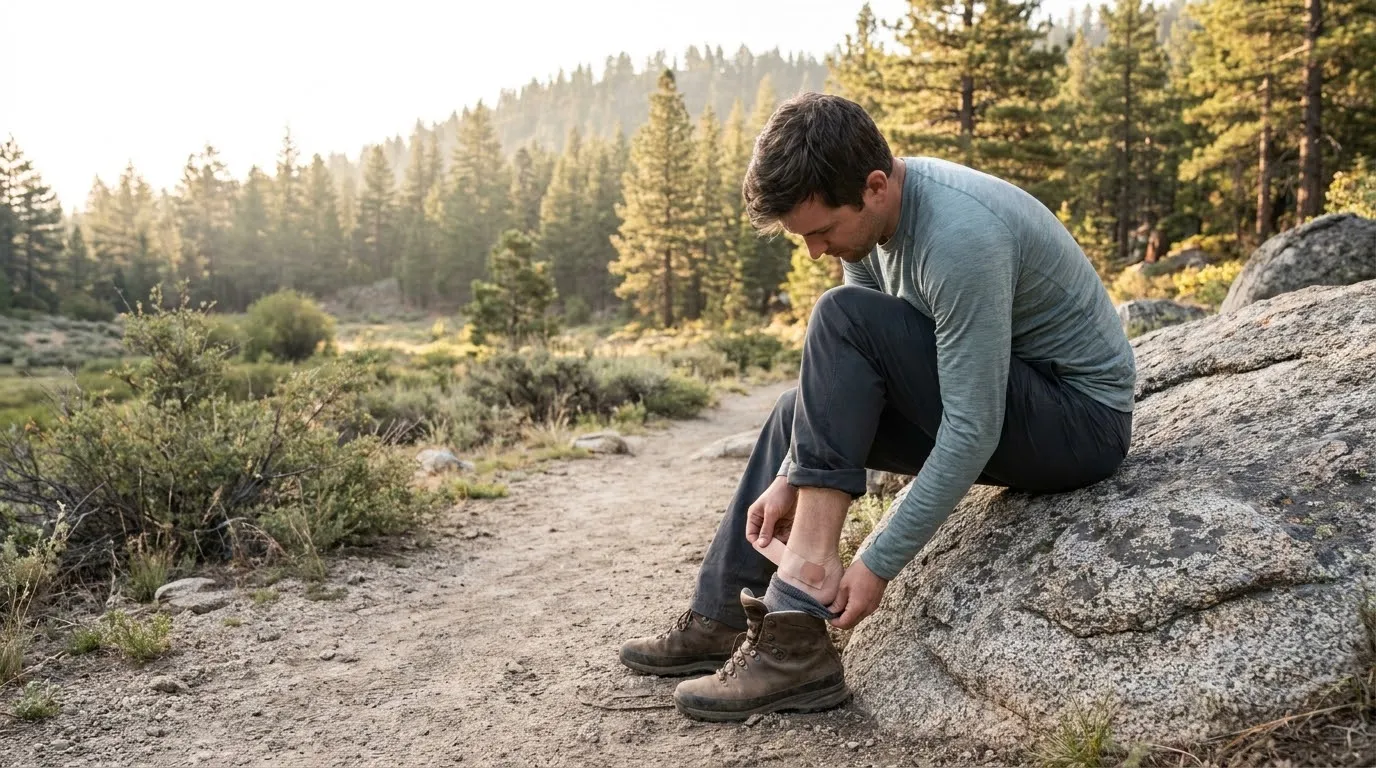
- Apply a barrier: Cover the red zone with a piece of rounded Leukotape, kinesiology tape, or moleskin. Smooth out all air bubbles and ensure the edges lie completely flat.
- Adjust lacing: Re-tie your boot laces with tension adjusted to eliminate foot slip before resuming your hike.
Field blister care and treatment guidelines
If a hot spot progresses into an actual blister during your journey, proper first aid protects the tissue from infection and relieves walking pain.
Medical guidance on intact blisters
When dealing with a closed blister that is filled with clear fluid, medical guidance from both the American Academy of Dermatology and the Mayo Clinic strongly advises leaving the skin intact whenever possible. The unbroken blister roof serves as a sterile biological dressing created by your own body, sealing out pathogens, dirt, and bacteria.
To protect an unbroken blister while continuing a hike:
- Cut a donut-shaped ring out of moleskin or foam padding, sizing the center hole slightly larger than the blister bubble.
- Place the donut over the blister so the raised ring absorbs footwear pressure while leaving the blister bubble floating untouched in the center cavity.
- Cover the entire donut assembly with a breathable strip of medical tape to hold it securely against the foot.
When and how to drain a painful blister safely
If an intact blister is large, tense, and positioned directly beneath a major weight-bearing zone, like the heel strike or ball of the foot, continuing to walk will inevitably cause a violent blowout. In this situation, controlled drainage under sanitary conditions is preferable to an uncontrolled rupture inside a dirty hiking boot.
According to Mayo Clinic first-aid procedures, follow these sanitary steps if drainage is necessary:
- Wash your hands thoroughly with soap and clean water or hand sanitizer.
- Cleanse the blister and surrounding skin with an antiseptic wipe or povidone-iodine solution.
- Clean a sharp needle with an antiseptic wipe or rubbing alcohol (Mayo Clinic), or sterilize a small needle using rubbing alcohol (American Academy of Dermatology).
- Gently puncture the blister near its lower edge with one or two small pinpricks, allowing gravity to assist drainage.
- Gently press fluid out toward the puncture holes using a sterile gauze pad.
- Crucially, leave the overlying skin roof completely in place. Do not peel, snip, or trim the collapsed skin, which continues to shield the raw dermal bed beneath.
- Apply a thin layer of petroleum jelly or antibiotic ointment and cover with a sterile, nonstick pad secured with medical tape.
Dressing an open or torn blister
When a blister roof has already torn or peeled away, treat the injury as an open dermal wound:
- Irrigate the raw area with clean drinking water to flush away trail dirt and lint.
- Cleanse the surrounding intact skin with an antiseptic wipe, avoiding direct contact with the raw crater.
- Apply a specialized hydrocolloid dressing directly over the raw skin, or apply antibiotic ointment covered with a sterile nonstick pad.
- Secure the dressing with wide adhesive tape, wrapping far enough around the heel or foot to ensure edges do not curl during stride mechanics. Always carry essential wound care items listed in the Ten Essentials checklist.
Recognizing signs of wound infection
A blister that becomes infected requires close monitoring and medical evaluation. According to Mayo Clinic, warning signs of an infected blister include:
- Expanding skin color changes that spread out from the blister.
- Increasing pain.
- Pus.
- Warm skin.
If you notice these signs, or the American Academy of Dermatology’s list of redness, pus, or increased pain or swelling, stop your hike and see a doctor.
Footwear lacing techniques to eliminate slippage
Adjusting how you lace your footwear alters internal pressure distribution and stops foot movement before it causes friction.
The heel lock or runner’s loop
Heel slippage is the primary cause of posterior calcaneal blisters. If your heel lifts inside the cup on uphill climbs, utilize a heel lock technique:
- Unlace the top two pairs of eyelets or speed hooks.
- Lace the cord straight upward between the two upper eyelets on the same side without crossing over, creating a vertical loop on each side of the collar.
- Cross your lace ends over the tongue and thread each lace through the opposite vertical loop.
- Pull the lace ends outward and downward to cinched tension, locking your heel securely into the back pocket before tying a standard knot.
Window lacing for instep pressure relief
If you experience painful friction or hot spots across the top of your foot or bony instep:
- Unlace your boots down to the eyelet pair immediately below the painful pressure point.
- Route the lace vertically up the outside of the eyelet to the next rung on the same side, skipping the cross-over pattern.
- Resume normal criss-cross lacing above the sensitive zone. This creates an open window across your high instep, eliminating downward tongue pressure while preserving ankle stability.
Frequently asked questions
What causes blisters when hiking?
Friction blisters develop when repeated shear forces rub the upper layers of skin against underlying tissue. Moisture amplifies this friction by softening the stratum corneum and causing skin to stick to damp socks. Poor footwear fit, such as a heel pocket with excessive slip or a toe box that pinches, concentrates that friction into small pressure zones. When friction, moisture, and localized pressure combine over thousands of steps, fluid accumulates between skin layers to form a blister.
Should you pop a blister while hiking?
Medical authorities including the American Academy of Dermatology and Mayo Clinic advise against popping blisters whenever possible. The intact skin roof acts as a sterile biological barrier that shields sensitive new tissue from bacteria and debris on the trail. If an unbroken blister is so swollen and painful that walking is impossible, sterilize a clean needle with alcohol, puncture tiny holes at the edge to drain fluid, and leave the skin flap intact over the wound.
What is the best tape to use for hiking blisters?
Rigid medical tapes like Leukotape P and kinesiology tape adhere exceptionally well to sweaty feet without rolling off during prolonged mileage. Hydrocolloid dressings, such as Compeed pads, cushion tender areas and support moist wound healing for established blisters. Traditional moleskin also works well when cut into a donut shape to relieve pressure around a blister, provided you anchor the moleskin with adhesive tape so trail dust and sweat do not peel it loose.
How do hiking socks prevent blisters?
Quality hiking socks made from merino wool or synthetic fibers wick sweat away from your skin toward the outer footwear lining, keeping feet drier and reducing skin maceration. Unlike cotton, which absorbs moisture and becomes abrasive when wet, wool retains resilient cushioning under foot pressure. A snug, anatomical knit prevents loose fabric from bunching inside your boots, eliminating a major source of localized rubbing across the toes and heels.
When should you stop hiking to treat a hot spot?
Stop hiking the moment you sense a warm, localized rubbing sensation or slight burning on your skin. A hot spot represents early tissue irritation before fluid separates the skin layers. If you halt immediately, remove your footwear, dry the skin, and apply protective tape or moleskin, you can halt the mechanical friction before an actual blister develops. Waiting until an ache turns into sharp pain usually means a blister has already formed.
What are the signs that a hiking blister is infected?
According to Mayo Clinic, signs of infection include expanding skin color changes that spread out from the blister, increasing pain, pus or warm skin. If you experience these infection symptoms, cleanse the area, protect it with sterile dressing, and seek medical attention promptly.